
This post may contain affiliate links. Please see my disclosure policy.
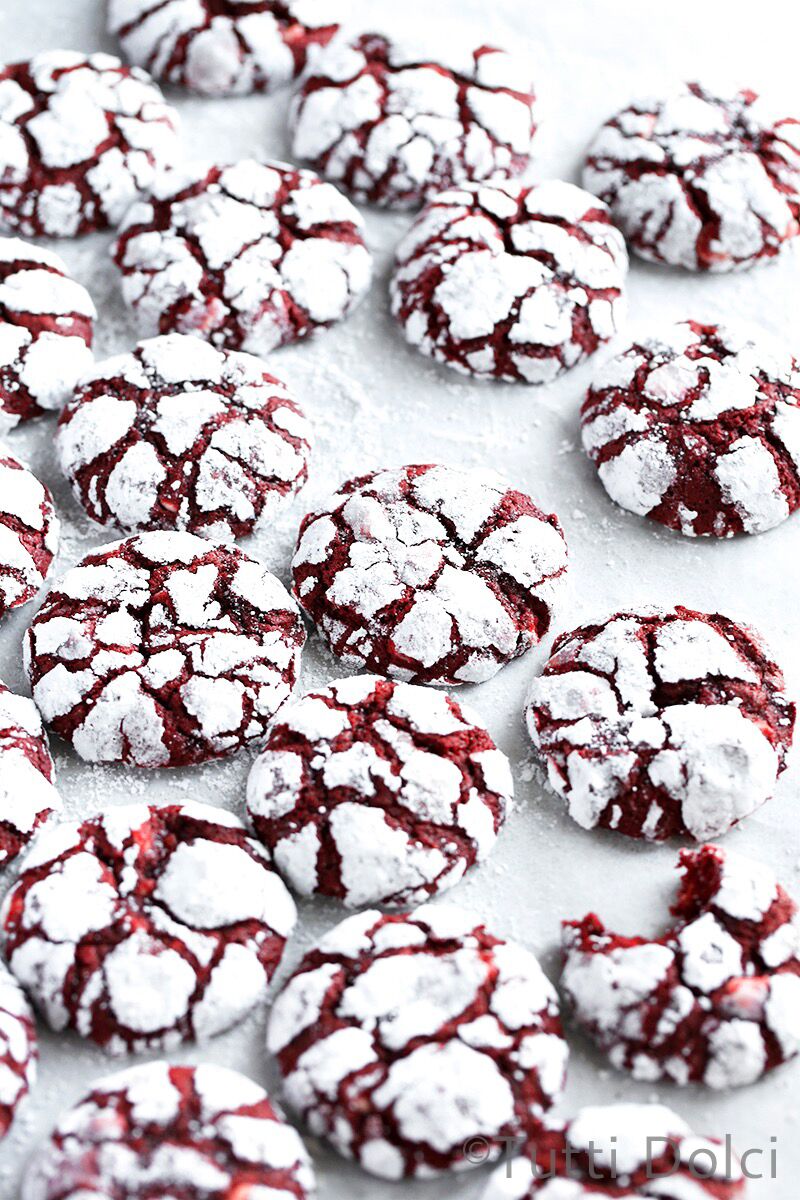
These soft baked red velvet crinkle cookies are the best ever! Rolled in powdered sugar for a snowy appearance, they bake up soft and pillowy with perfect crackle tops. For the best texture, cover and chill the cookie dough for 2 hours before baking – so worth it! Recipe yields 26 to 28 cookies, enough to enjoy and share!
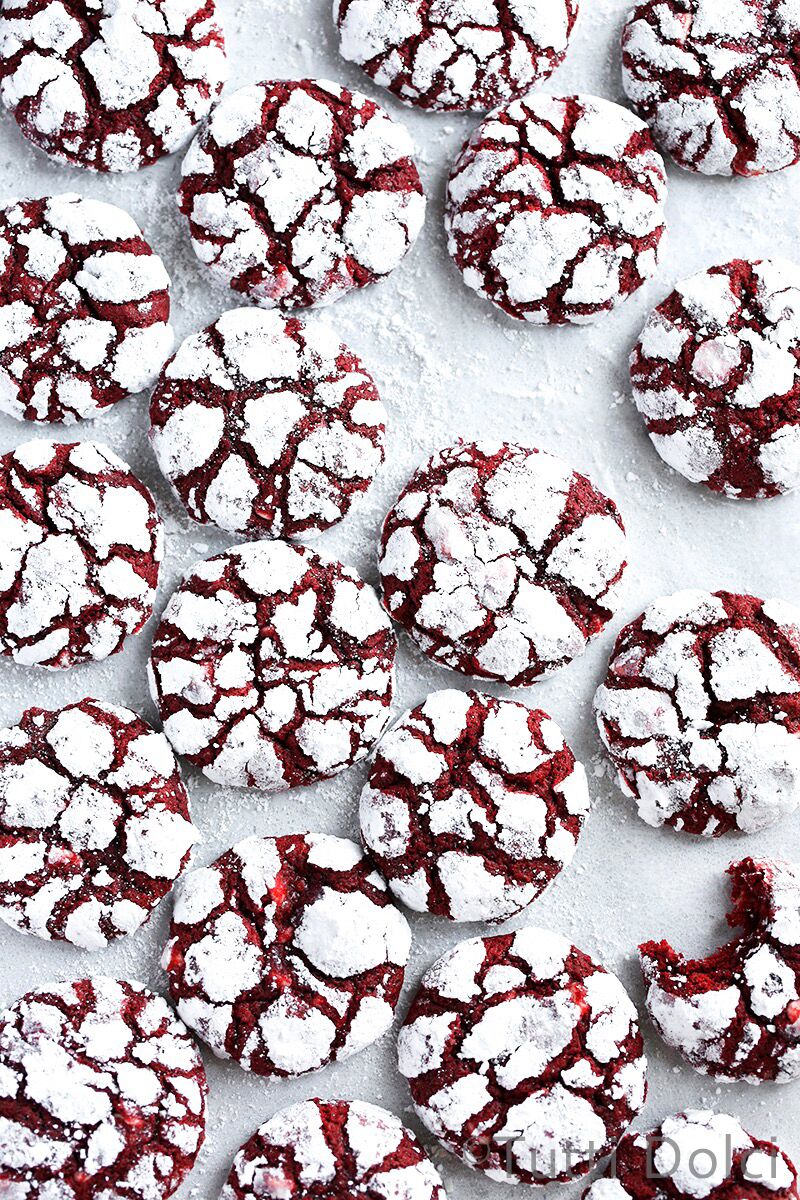
With their deep red color and rich, fudgy centers, these red velvet crinkles are a seasonal favorite for me.
They’re perfect to make while decorating the tree (pair them with hot cocoa!) and add a festive touch to any holiday cookie tray. Sweet and creamy white chocolate chips folded into the dough melt into each bite.
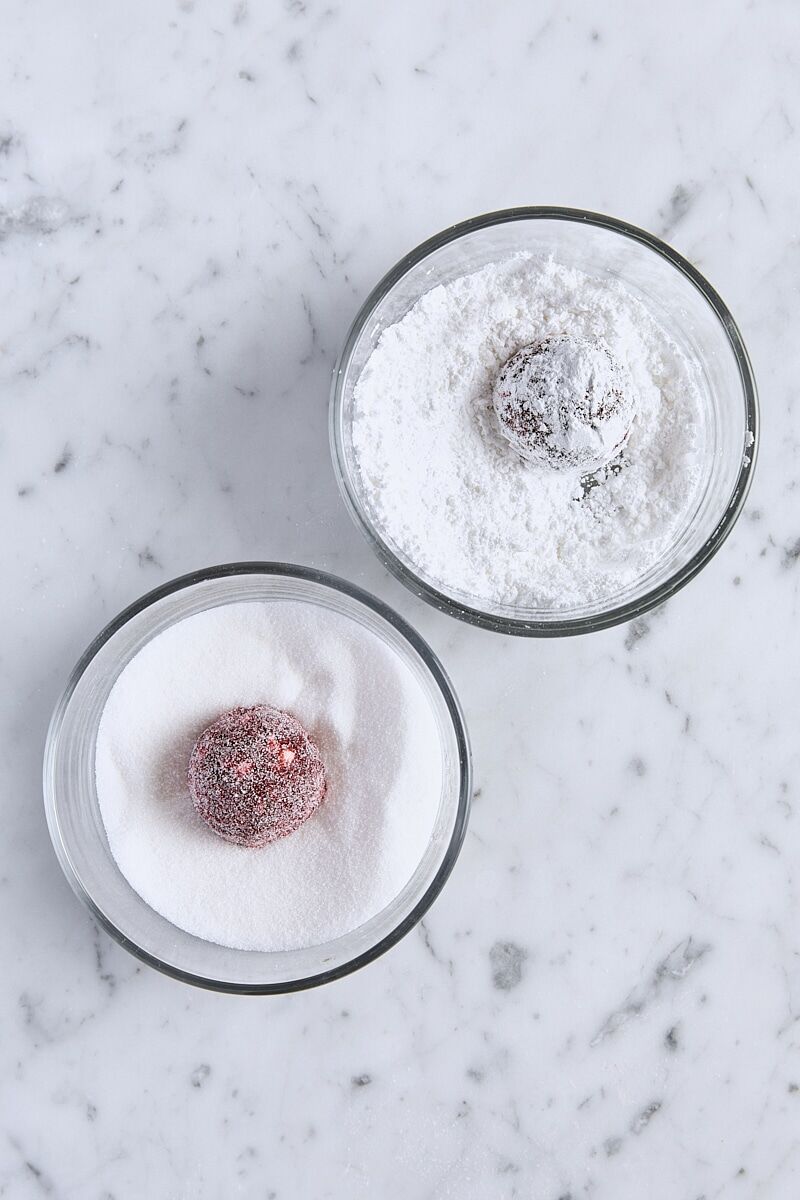
My foolproof, tested method for perfect crinkle cookies is a double coating of sugar. Rolling the cookie dough in granulated sugar before coating in powdered sugar helps the cookies crackle as they bake and keeps the powdered sugar coating in place.
For even more crinkle cookie love, don’t miss my fudgy chocolate crinkle cookies or chocolate peppermint crinkle cookies!

How to Make Red Velvet Crinkle Cookies
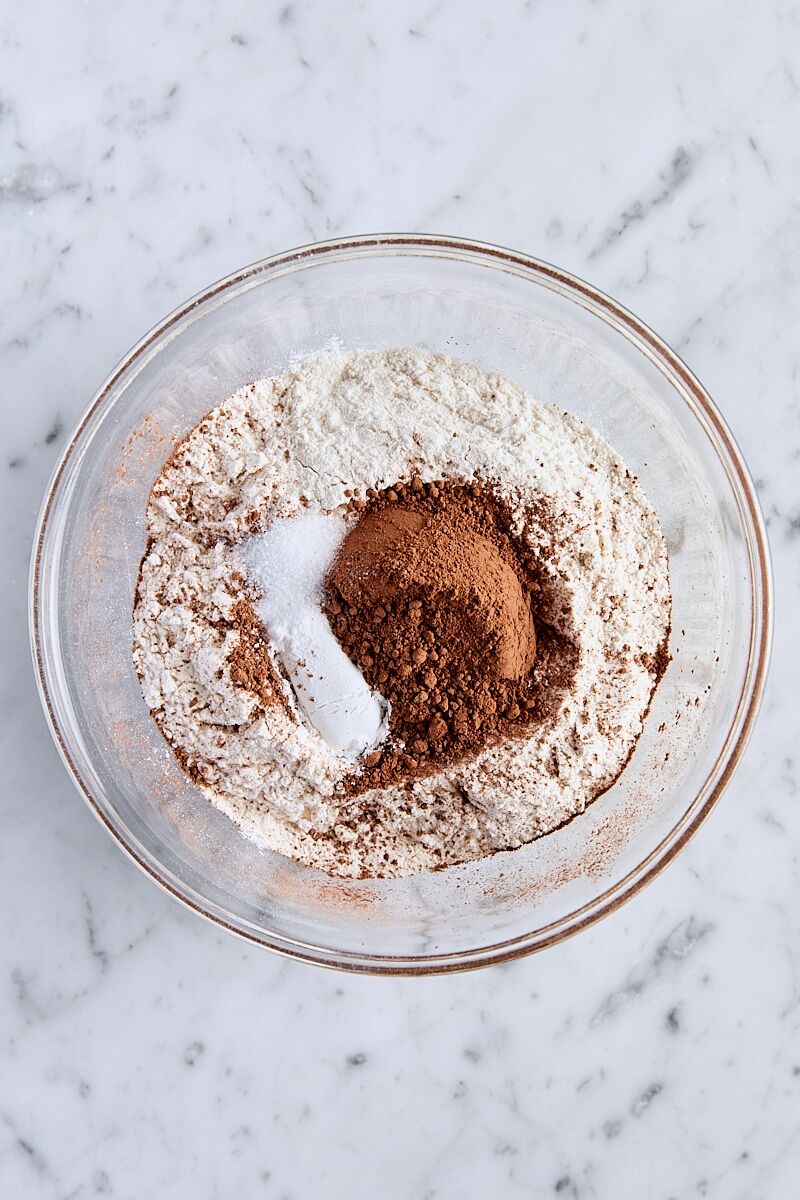
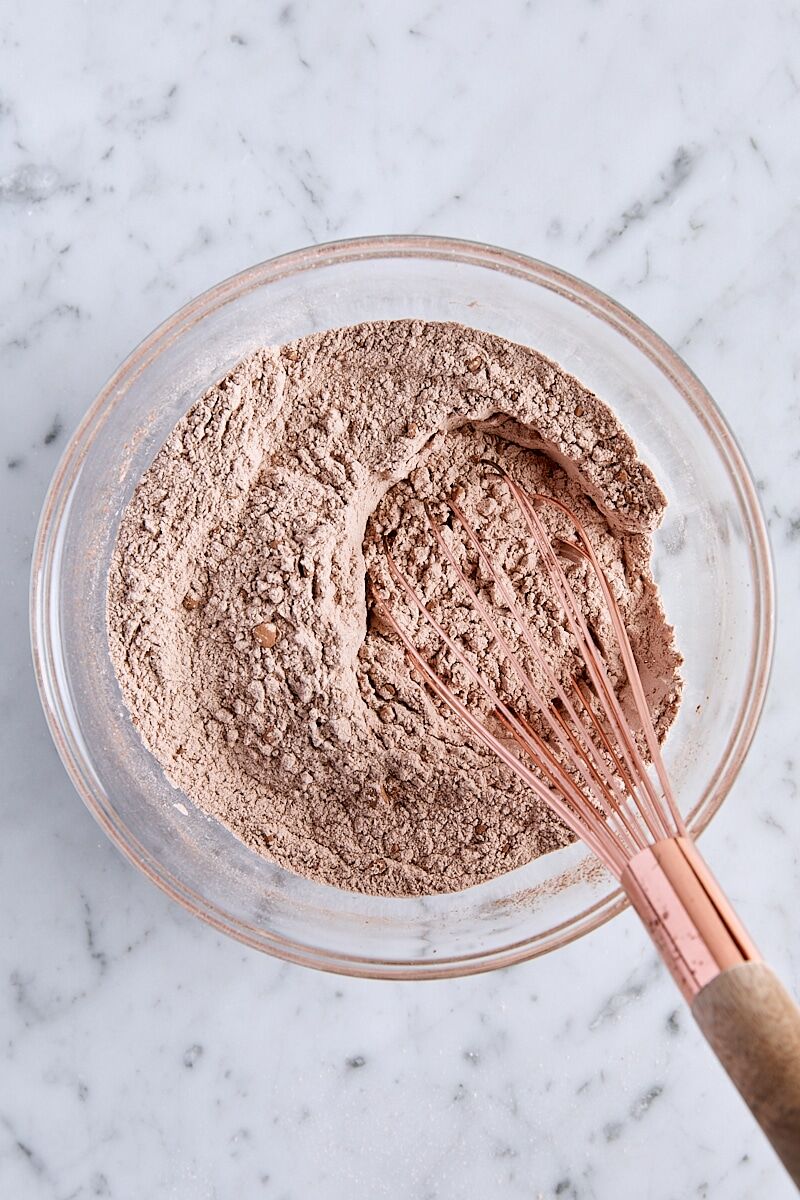
Whisk together flour, unsweetened natural cocoa powder, baking powder, baking soda, and salt in a medium bowl.
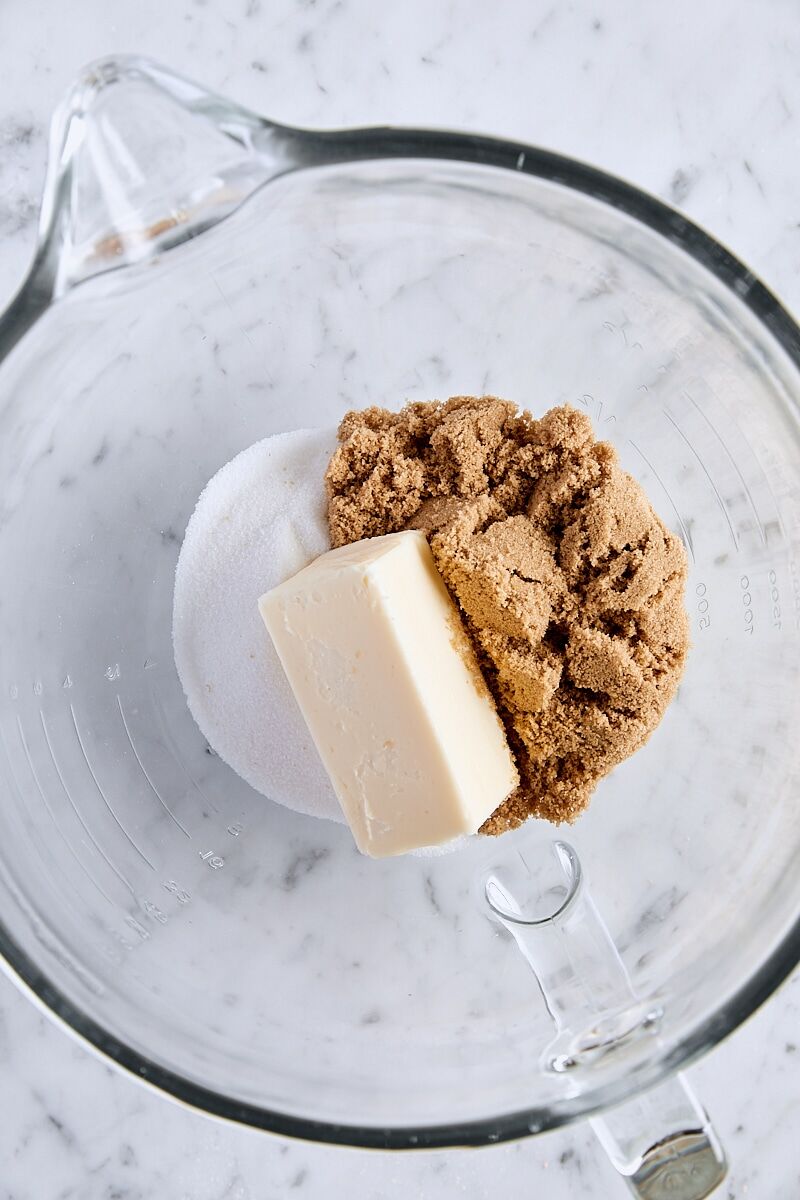
Beat butter, granulated sugar, and brown sugar together on medium speed for about 2 minutes, until soft and creamy.
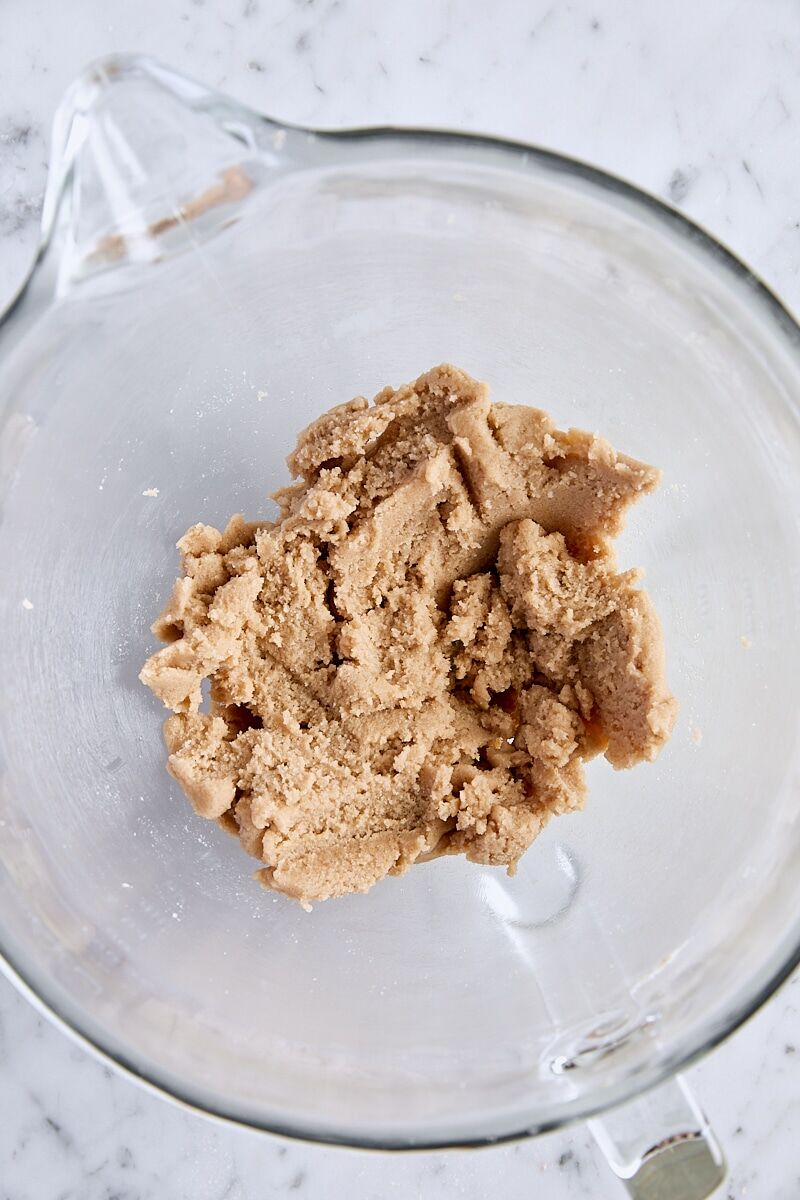
Add eggs one at a time and beat until combined.


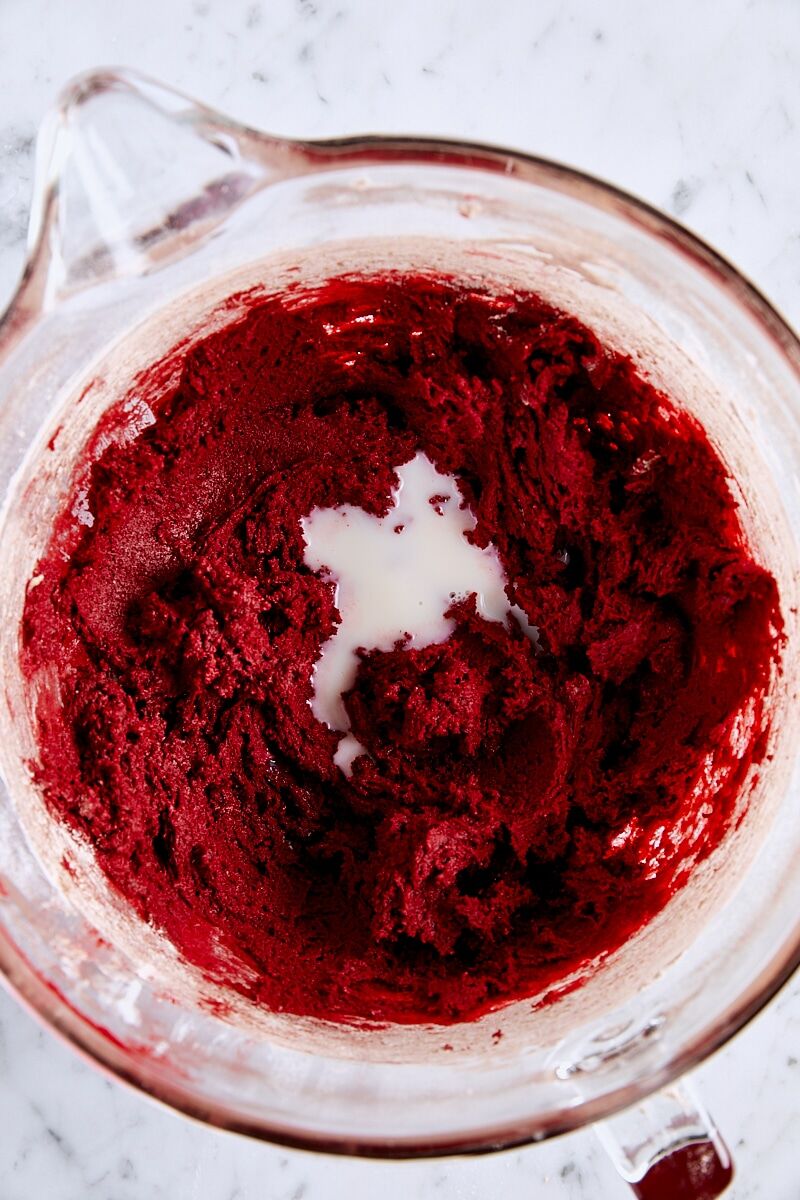
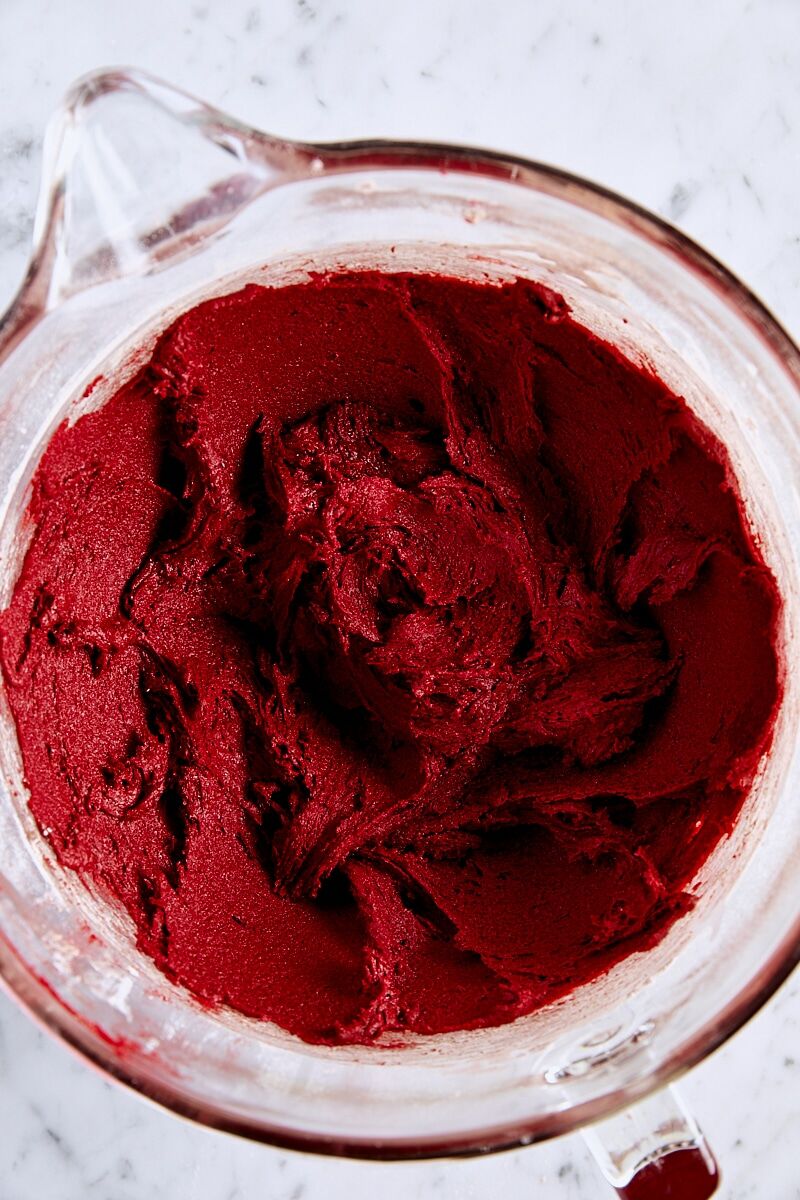
Beat in vanilla extract, lemon juice, and red gel food coloring until combined. Reduce speed to low and gradually add flour mixture.


Add milk and mix in on low speed just until combined.
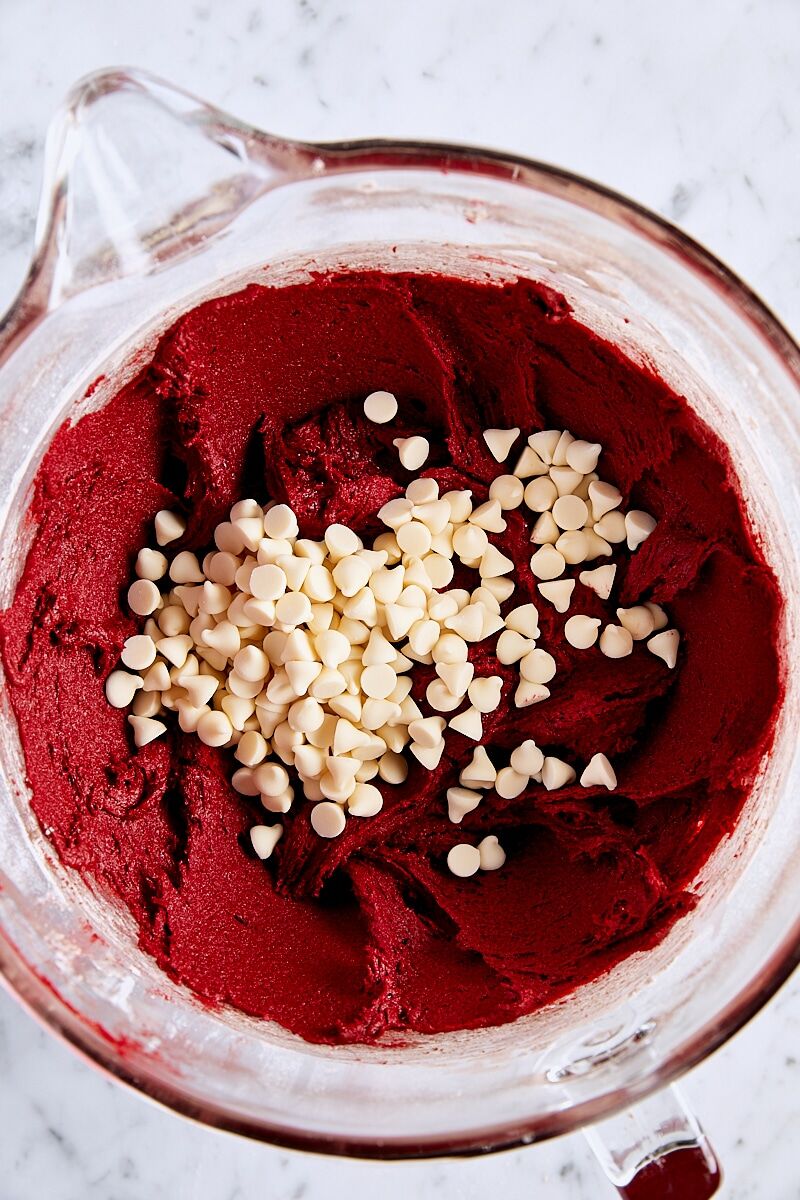
Fold in white chocolate chips with a spatula. The red velvet dough is soft and thick, so chilling is a must!

Cover the dough and chill it in the refrigerator for 2 hours. This quick rest develops the flavor and helps the cookies hold their shape in the oven.
Use a medium cookie scoop to form balls of dough. Roll the balls in granulated sugar and then coat generously in powdered sugar. Place about 2 inches apart on baking sheets.
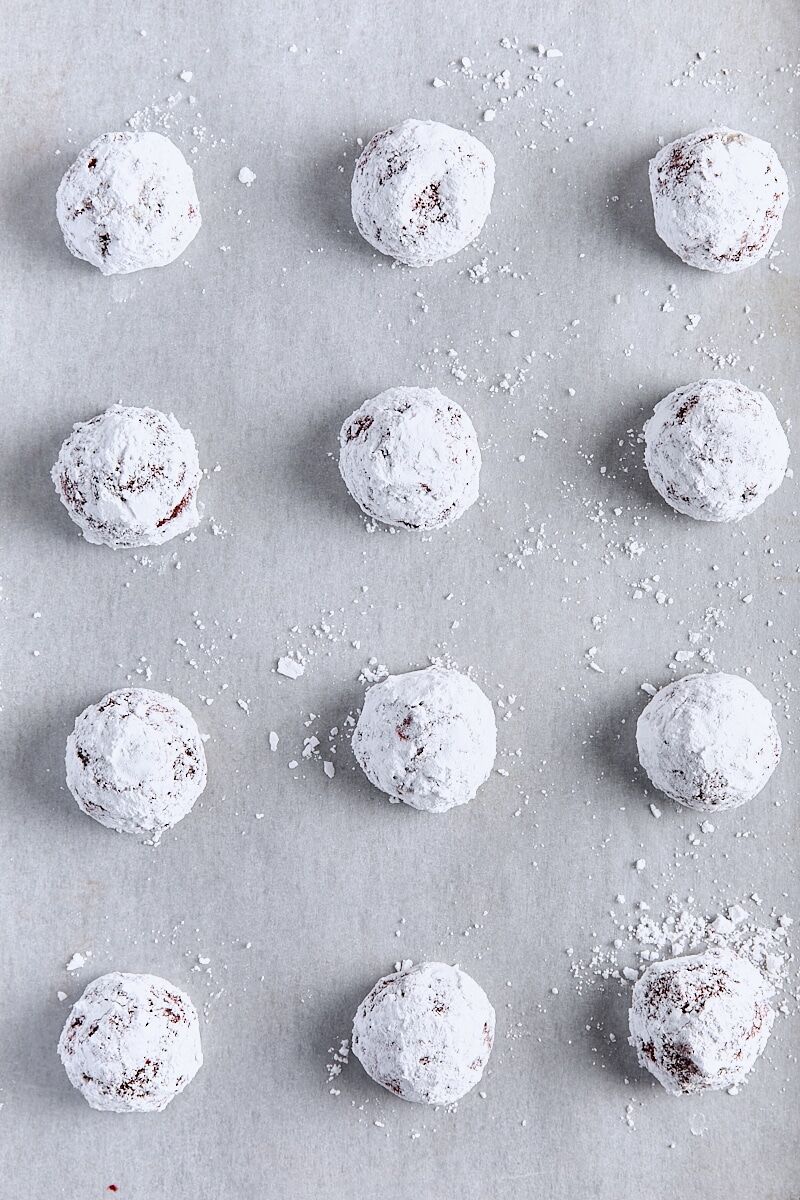
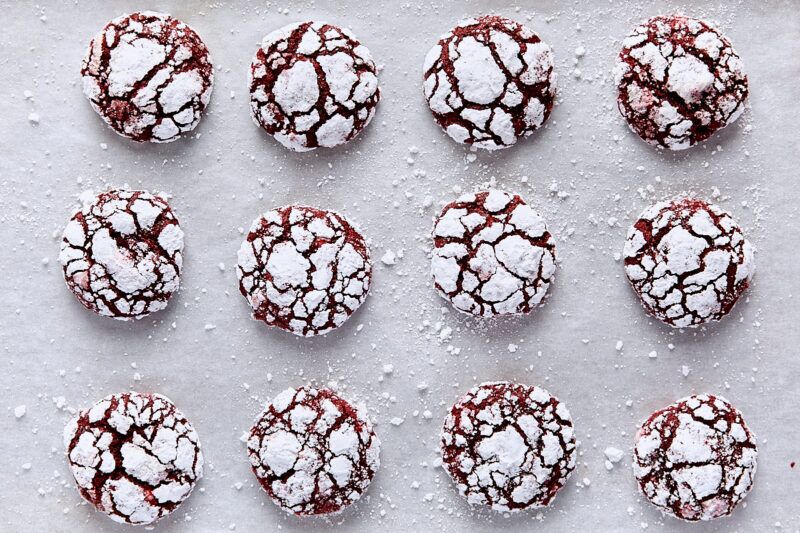
Bake until cookies are puffed and cracked, with edges set, about 12 minutes. Cool for 5 minutes on baking sheets, then transfer to a wire rack to cool completely.
You’ll love these festive Christmas cookies!
Favorite holiday cookie recipes:
- Soft Molasses Spice Cookies
- Peppermint Brownie Cookies
- Almond Thumbprint Cookies
- Brown Butter Sugar Cookies

Soft Baked Red Velvet Crinkle Cookies
- Prep Time: 20 minutes
- Chill Time: 2 hours
- Cook Time: 12 minutes
- Total Time: 2 hours 32 minutes
- Yield: 26 to 28 cookies
- Category: Dessert
- Method: Bake
- Cuisine: American
Description
These red velvet crinkle cookies are the best ever! Rolled in powdered sugar for a snowy appearance, the cookies bake up soft and pillowy with the perfect crackle. Recipe yields 26 to 28 cookies, enough to enjoy and share!
Ingredients
Cookies
- 2 cups (280 g) all-purpose flour
- 1/3 cup (32 g) unsweetened natural cocoa powder
- 1 tsp (5 g) baking powder
- 1/4 tsp baking soda
- 1/2 tsp (3 g) salt
- 1/2 cup (112 g) unsalted butter, at room temperature
- 3/4 cup (150 g) granulated sugar
- 1/2 cup (100 g) light brown sugar
- 2 large eggs (100 g)
- 1 tsp (4 g) vanilla extract
- 1 tsp (5 g) lemon juice
- 1 Tbsp (21 g) red gel food coloring
- 1 1/2 Tbsp (22 g) milk
- 3/4 cup (128 g) white chocolate chips
For Rolling
- 1/2 cup (100 g) granulated sugar
- 1/2 cup (60 g) powdered sugar
Instructions
- Make dough: Whisk together flour, cocoa powder, baking powder, baking soda, and salt in a medium bowl. Beat butter and sugars in a large mixer bowl at medium speed until creamy, about 2 minutes. Add eggs one at a time, and beat until combined. Beat in vanilla, lemon juice, and gel food coloring until combined. Reduce speed to low and gradually add flour mixture; beat just until incorporated. Add milk and mix in on low speed just until combined. Fold in white chocolate chips.
- Chill dough: The dough will be thick and soft – cover and chill in the refrigerator for 2 hours.
- Preheat oven to 350°F and line two baking sheets with parchment paper.
- Roll cookies: Place granulated sugar and powdered sugar in separate shallow bowls. Use a medium cookie scoop coated with nonstick spray to form 1 1/2-inch balls of dough (approximately 30 grams each) and roll in granulated sugar to coat, then coat generously in powdered sugar. Place two inches apart on prepared baking sheets.
- Bake cookies for 12 minutes, rotating pans halfway through, until cookies are puffed and cracked, with edges set. If desired, tap baking sheets sharply once or twice to flatten the baked cookies slightly. Let cookies cool for 5 minutes on baking sheets, then transfer to a wire rack to cool completely.
- Store cookies in an airtight container at room temperature up to 3 days.


Notes
Unsweetened natural cocoa powder: Natural cocoa is more acidic than Dutch process cocoa, and also lighter in color, making the red hue of the cookies vibrant.
Lemon juice: Fresh lemon juice acts as an acid to boost the color of the cookies. If you don’t have lemon juice on hand, you can use 1 teaspoon of white vinegar instead.
Red gel food coloring: I use and recommend AmeriColor Super Red Soft Gel Paste. Gel color is more concentrated than liquid food coloring, so you don’t need to add as much of it – this helps maintain the texture of the cookies.
Make ahead: Roll the dough into balls (without the sugar coating) and freeze on a baking sheet for 1 hour, then transfer to an airtight container in the freezer for up to 2 months. Just before baking, roll the cookie dough in granulated sugar, coat in powered sugar, and bake as directed, adding 1-2 minutes to baking time.
Freeze cookies: You can freeze red velvet crinkle cookies for up to 1 month. After they have cooled completely, freeze flat on a baking sheet for 1 hour, then transfer to an airtight container in the freezer (layer between pieces of parchment paper). When you’re ready to enjoy, thaw the cookies at room temperature.


Hello! Would it be ok to change the milk to buttermilk in this recipe? If so, would I add the same amount called for, or would you recommend something different? Thank you so much. I am so excited to try!! Making for a Galentines event 🙂
Hi Selena, for best results I recommend using plain milk. The dough already contains acid from the lemon juice, so buttermilk is unnecessary. Happy baking!
I’ve made these cookies three years in a row at Christmas. My friends and family always request them. They are delicious!!!
Thanks so much, Cassandra! Merry Christmas!
I plan to make these over the weekend, they look & sound amazing. Just querying the amount of red food colouring, it does sound like a lot, -does it depend which colouring you use?
TIA
Hi Kath, I recommend red gel food coloring for the deepest red color without affecting the texture of the dough. The amount is correct – it’s roughly 1 small bottle (0.75oz/21g) of gel coloring.
Thank you, I’ll give it a go!
There is nothing like a sea of crinkle cookies to say “holiday” to me. I make them every year, but this is the first time making red velvet crinkles and they are amazing! Such great flavor and texture and they are so festive! They are a beautiful addition to my holiday lineup!
Such perfect crinkles! Thanks so much for sharing, Adrienne!
Can I freeze the dough before baking? Then bake once thawed? 🙂
Hi Fiona, yes. Roll the dough into balls (without the sugar coating) and freeze flat on a baking sheet for 1 hour, then transfer to an airtight container in the freezer for up to 2 months. Just before baking, roll the dough balls in granulated sugar, coat in powered sugar, and bake as directed.
Fabulous cookies! The centers are so fudgy and the cookies crackled beautifully. Excited to add these to my Christmas cookie boxes!
Thanks so much, Kim!